Sticky Honey Butter Chicken Recipe
Introduction
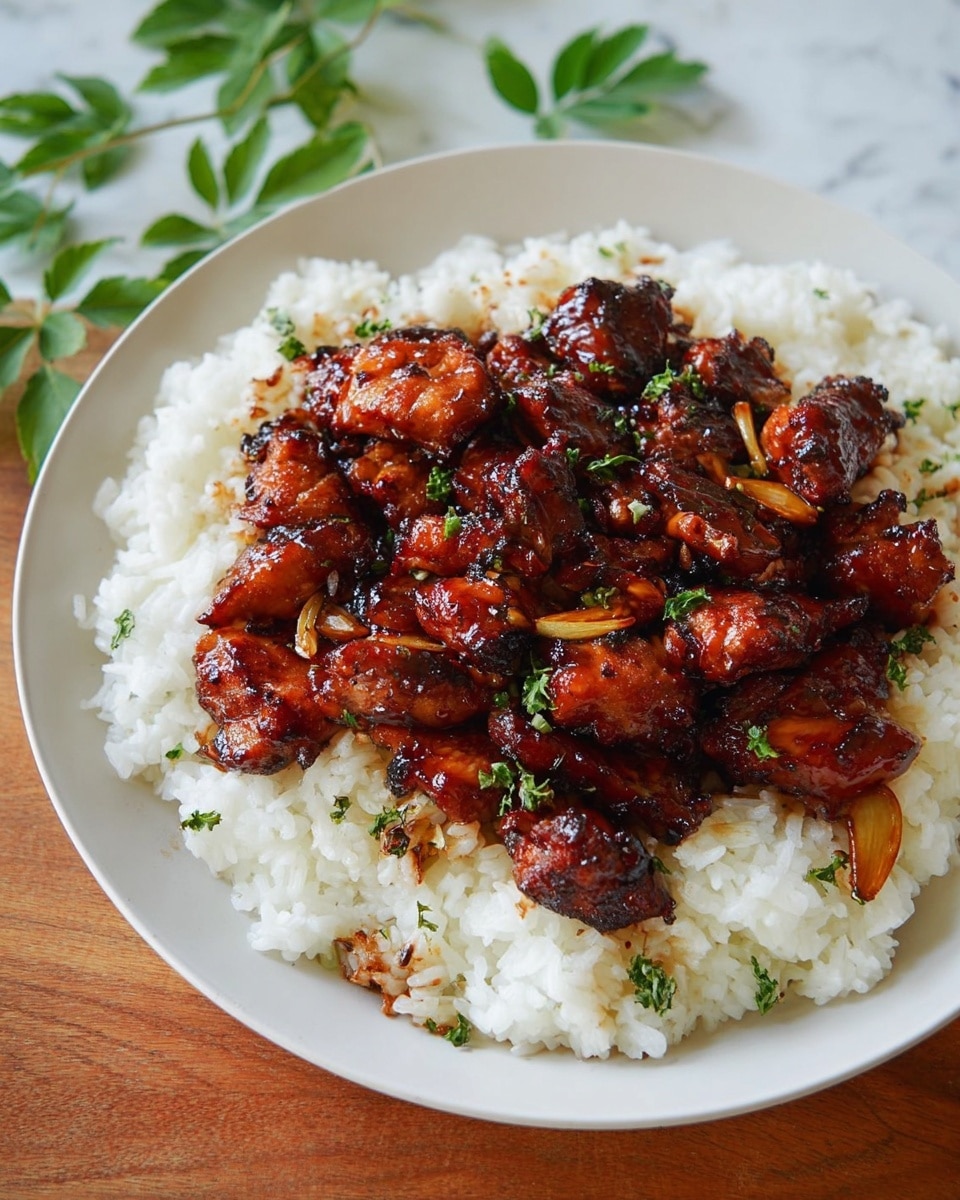
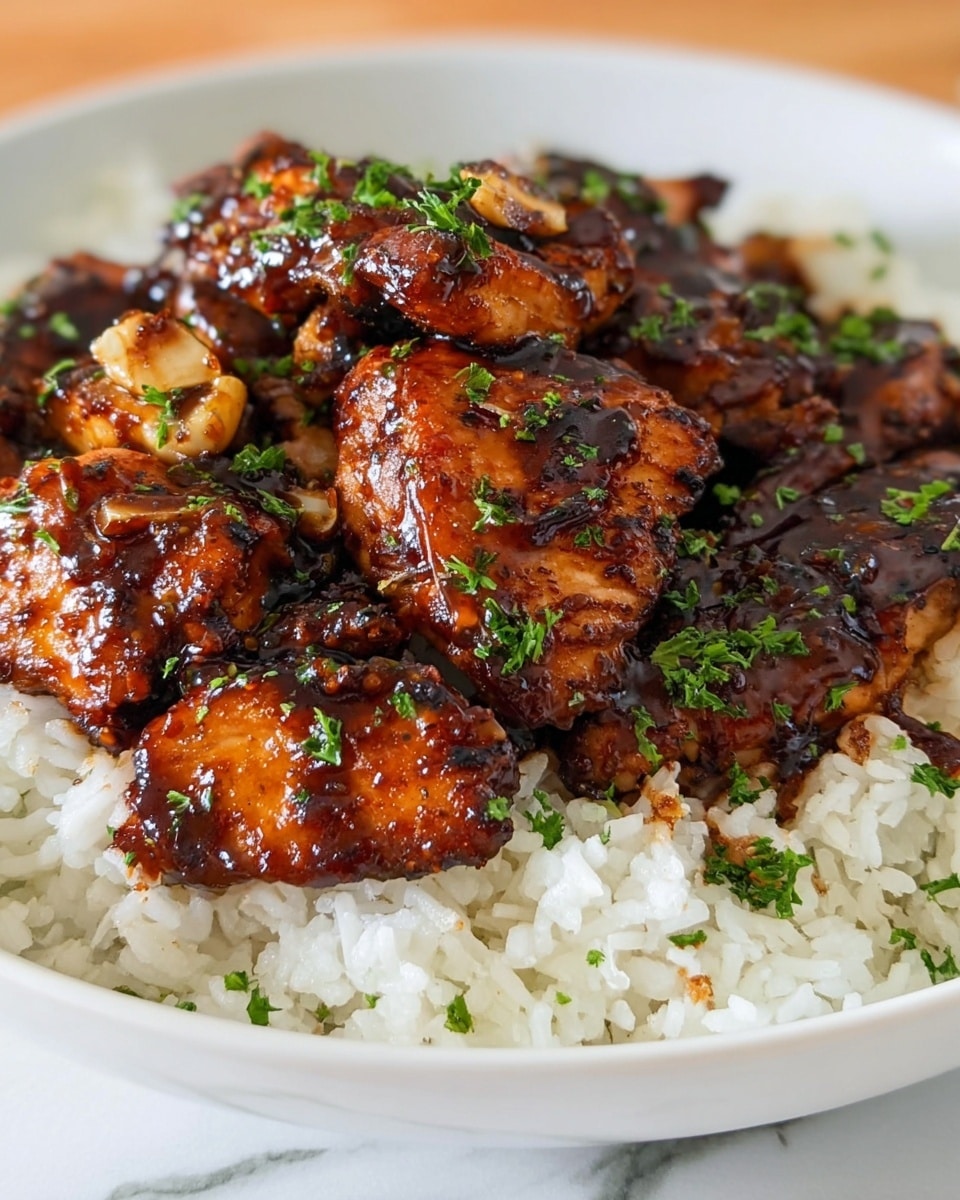
Sticky Honey Butter Chicken is a quick and delicious dish that combines crispy chicken thighs with a luscious honey butter sauce. Ready in just 20 minutes, it’s perfect for a flavorful weeknight meal that everyone will love.
Ingredients
- 1 lb chicken thighs (boneless skinless, cut into 2” pieces)
- 1 tbsp cornstarch
- 1 tbsp flour (you can use Bob’s gluten free 1 to 1)
- 1/2 tsp salt
- 1/2 tsp black pepper
- 1/2 tsp garlic powder
- 3 garlic cloves (sliced thinly)
- 1 tbsp avocado oil
- 1/4 cup honey
- 2 tbsp soy sauce (or tamari)
- 1 tbsp rice vinegar
- 2 tbsp cold unsalted butter
- Garnish with finely chopped parsley
Instructions
- Step 1: Cut the chicken thighs into 2-inch bite-sized pieces. In a large bowl, combine the cornstarch, flour, salt, pepper, and garlic powder. Toss the chicken pieces in the mixture until they are lightly coated.
- Step 2: Heat avocado oil in a large skillet over medium heat. Once hot, add the chicken in a single layer. Cook for 8 minutes per side until the chicken is golden brown and crispy. Ensure each piece is well-seared for that perfect crunch. Remove the chicken and set aside.
- Step 3: Add the sliced garlic to the pan and cook for 1 minute until fragrant.
- Step 4: Lower the heat and add the cold butter, honey, soy sauce, and rice vinegar to the pan. Stir well to combine and create a glossy sauce. For a thinner sauce, add a splash of water.
- Step 5: Return the chicken to the pan and toss to coat evenly in the honey butter sauce.
- Step 6: Garnish with finely chopped parsley and serve hot.
Tips & Variations
- Use tamari instead of soy sauce for a gluten-free option.
- Adding a splash of water or chicken broth can help thin the sauce if it becomes too thick.
- Try substituting avocado oil with olive oil or vegetable oil if preferred.
Storage
Store any leftovers in an airtight container in the refrigerator for up to 3 days. Reheat gently in a skillet over low heat to keep the sauce glossy and the chicken crispy.
How to Serve
Serve this delicious recipe with your favorite sides.
FAQs
Can I use chicken breasts instead of thighs?
Yes, chicken breasts can be used, but thighs remain juicier and more flavorful in this recipe. If using breasts, be careful not to overcook as they dry out faster.
Is this dish spicy?
No, this recipe is not spicy. If you want some heat, you can add a pinch of red pepper flakes or a dash of hot sauce while making the sauce.
PrintSticky Honey Butter Chicken Recipe

This Sticky Honey Butter Chicken recipe features tender, crispy chicken thighs coated in a glossy honey butter sauce with a hint of garlic. Ready in just 20 minutes, it’s a quick and flavorful dish perfect for weeknight dinners.
- Prep Time: 5 minutes
- Cook Time: 15 minutes
- Total Time: 20 minutes
- Yield: 4 servings 1x
- Category: Main Course
- Method: Frying
- Cuisine: American
Ingredients
Chicken and Coating
- 1 lb chicken thighs (boneless skinless, cut into 2” pieces)
- 1 tbsp cornstarch
- 1 tbsp flour (you can use Bob’s gluten free 1 to 1)
- 1/2 tsp salt
- 1/2 tsp black pepper
- 1/2 tsp garlic powder
Sauce and Garnish
- 3 garlic cloves (sliced thinly)
- 1 tbsp avocado oil
- 1/4 cup honey
- 2 tbsp soy sauce (or tamari)
- 1 tbsp rice vinegar
- 2 tbsp cold unsalted butter
- Finely chopped parsley, for garnish
Instructions
- Prep the Chicken: Cut the chicken thighs into 2-inch bite-sized pieces. In a large bowl, combine the cornstarch, flour, salt, pepper, and garlic powder. Toss the chicken pieces in the mixture until they are lightly coated.
- Cook the Chicken: Heat avocado oil in a large skillet over medium heat. Once hot, add the chicken in a single layer. Cook for 8 minutes per side until the chicken is golden brown and crispy. Ensure each piece is well-seared for that perfect crunch. Remove the chicken and set aside.
- Add the Garlic: After the chicken is crispy, add the sliced garlic to the pan. Cook for 1 minute until fragrant.
- Make the Honey Butter Sauce: Lower the heat and add the cold butter to the pan. Stir in the honey, soy sauce, and rice vinegar to form the sauce. You can add a splash of water if you prefer a thinner sauce. Stir to combine and make the sauce glossy.
- Toss the Chicken: Add the cooked chicken back into the pan and toss it in the honey butter sauce until well coated.
- Serve: Garnish with finely chopped parsley and serve hot for a delicious, sticky, buttery chicken dish.
Notes
- Using cold butter at the end helps make the sauce glossy and rich.
- Add a splash of water if you want a thinner sauce consistency.
- For a gluten-free version, use a gluten-free flour blend as suggested.
- Make sure not to overcrowd the pan to ensure the chicken crisps up well.
- You can substitute avocado oil with any high-heat cooking oil such as vegetable or canola oil.
Keywords: honey butter chicken, sticky chicken, crispy chicken thighs, quick chicken recipe, skillet chicken, weeknight dinner